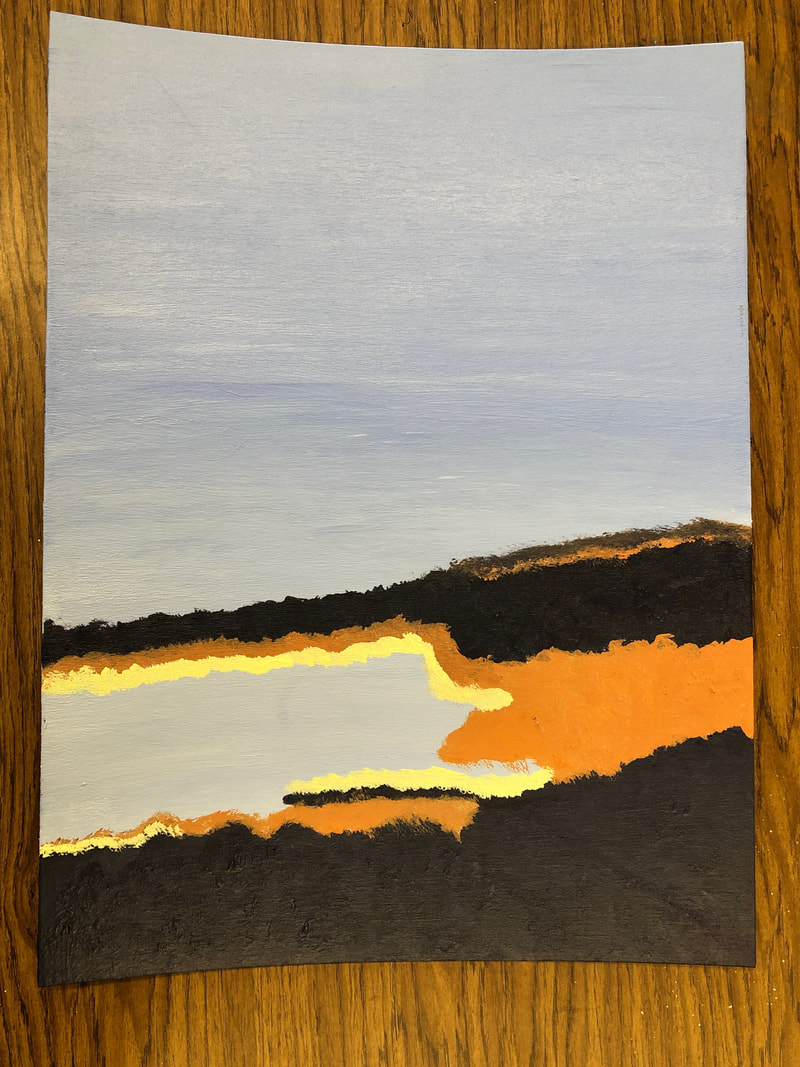
Project #8-->Landscape Pt 6
1. I tried to master acrylic paint. Similar to the other picture, I think I mastered the value of the ocean. However, I think I struggled with the reflection of the sun on the sand.
2. I drew inspiration from a photo of a sunset in San Diego that I took.
3. The process for this piece was the same as my last piece, I started with the sand on the bottom and worked my way up to the sand that the sun reflected off of, and finally the ocean.
4. I would work on the reflection of the sun to make it look more cohesive.
5. This is the last piece of a large landscape that I painted.
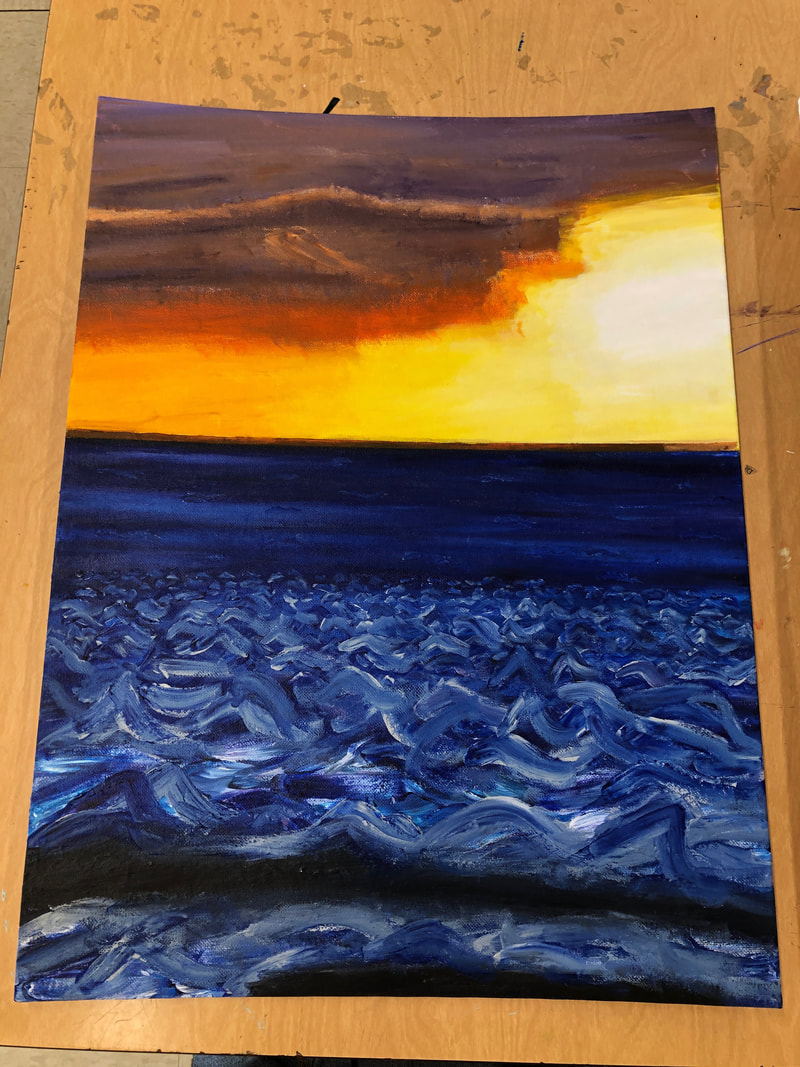
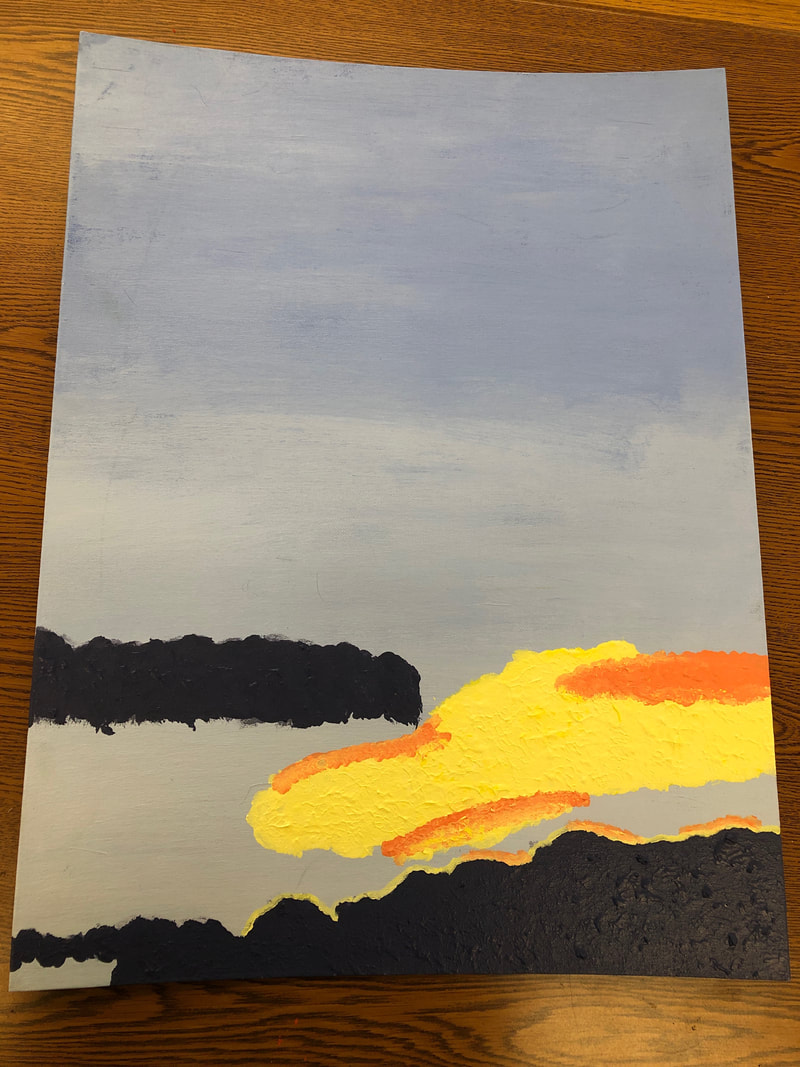
Project #7-->Landscape Pt 5
1. I tried to master acrylic paint. I think that I mastered blending the different values of blue at the top but I struggled with making the transition from the water to the sand cohesive.
2. I drew inspiration from a photo of a sunset that I took in San Diego.
3. First, I started on the dark sand, then I worked my way up to the sand that had the ocean and sun reflected on it, finally I worked on the shore line and the ocean.
4. I would work on blending the three different parts of my piece better to make it look like a smooth transition.
5. This piece is the bottom corner of my large sunset landscape.
Project #6-->Landscape Pt 4
1. I tried to master acrylic paint. I think I mastered matching the ocean and the sunset to the other sunset painting but I also struggled with it and had to experiment to figure out the techniques and colors I used in the previous painting.
2. I drew inspiration from a picture that I took in San Diego.
3. I did the same thing for this painting as I did for the previous, I started with the ocean, then the sun, and finally the sunset.
4. I think I would work more on the sunset and its shape.
5. This piece connects with my other pieces because it's another part of my large sunset landscape.
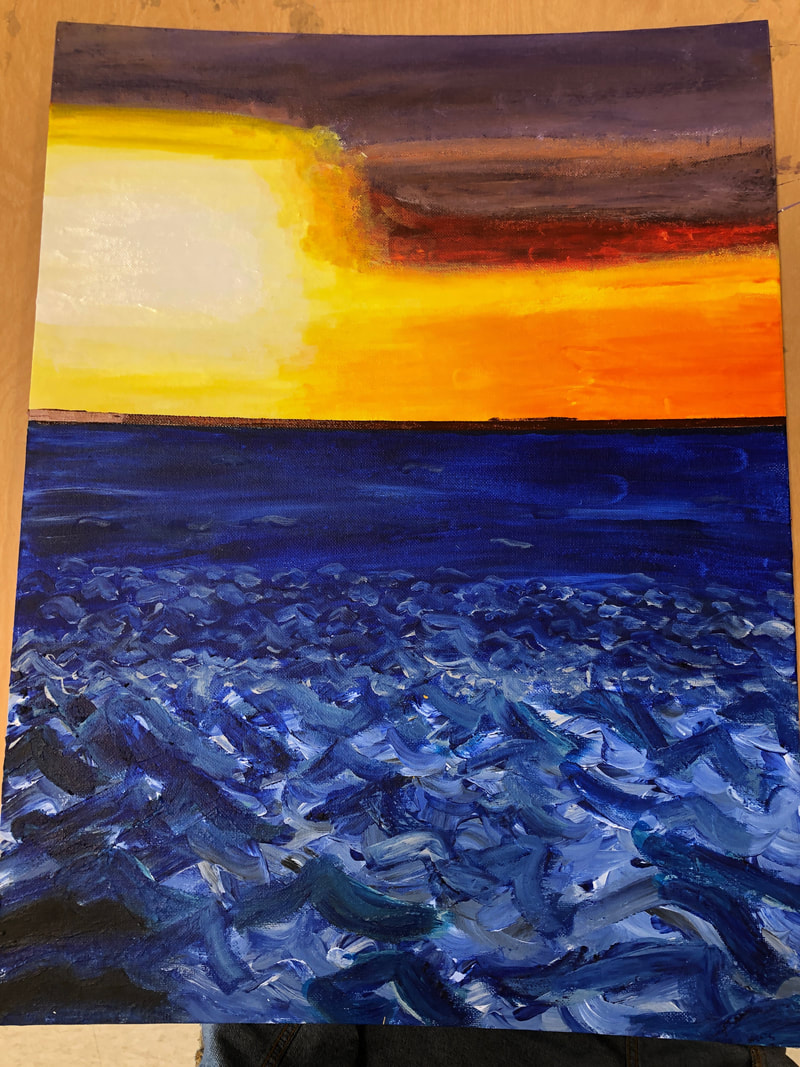
Project #5-->Landscape Pt 3
1. I tried to master acrylic paint. I mastered blending the different colors of the sunset and creating distance in the sea. I struggled with finding the right color match for certain colors in the sunset and had to do a lot of experimenting.
2. I drew inspiration from a picture of a sunset that I took on my trip to San Diego.
3. I first worked on the sea and then I started with the sun (the white in the center) and worked my way out to make the sunset.
4. I think I would work more on the texture of the waves.
5. This piece connects with my other pieces because it is another piece of the large sunset landscape that I'm working on.
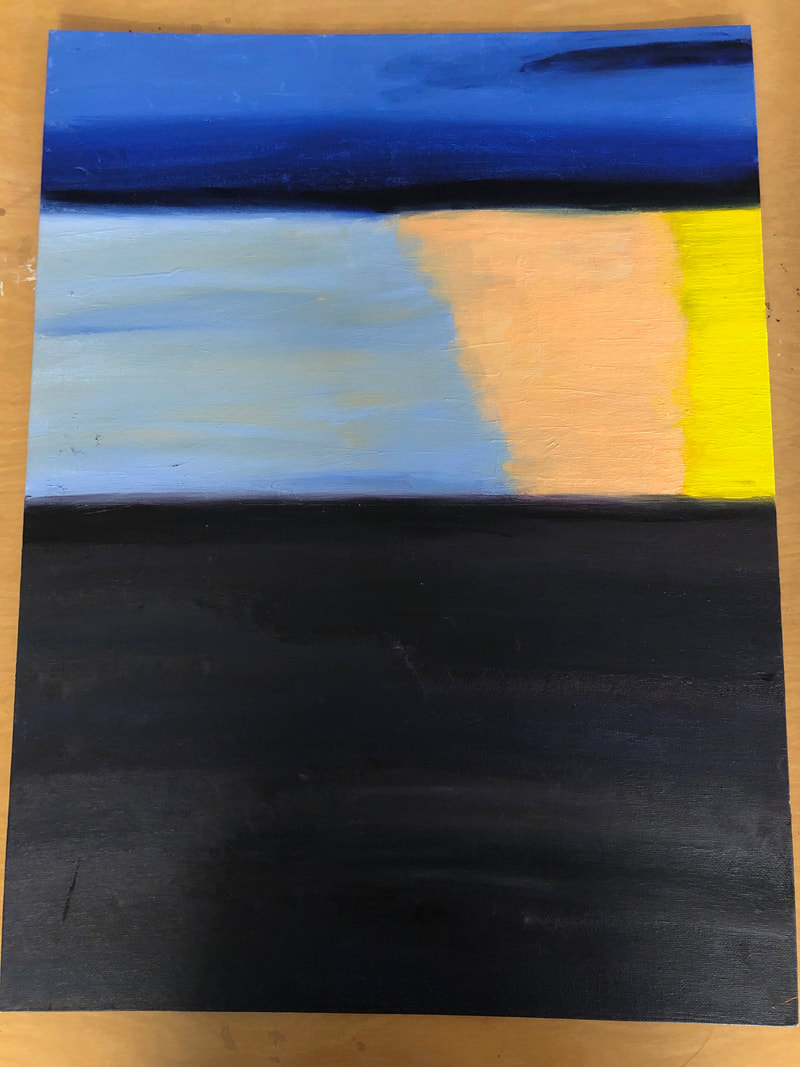
Project #4-->Landscape Pt 2
1. I tried to master acrylic paint. I mastered matching the values with my previous piece, but I struggled with it at first and it took me a few times to get the color right.
2. I drew inspiration from the picture that I took while I was in San Diego of a sunset.
3. I first painted the ombre sky, then I painted the darker clouds, and finally I painted the lighter clouds.
4. I would put more texture in the clouds to give it more dimension.
5. This piece connects with my other piece because together, these pieces are the top third of a large landscape that I'm going to paint.
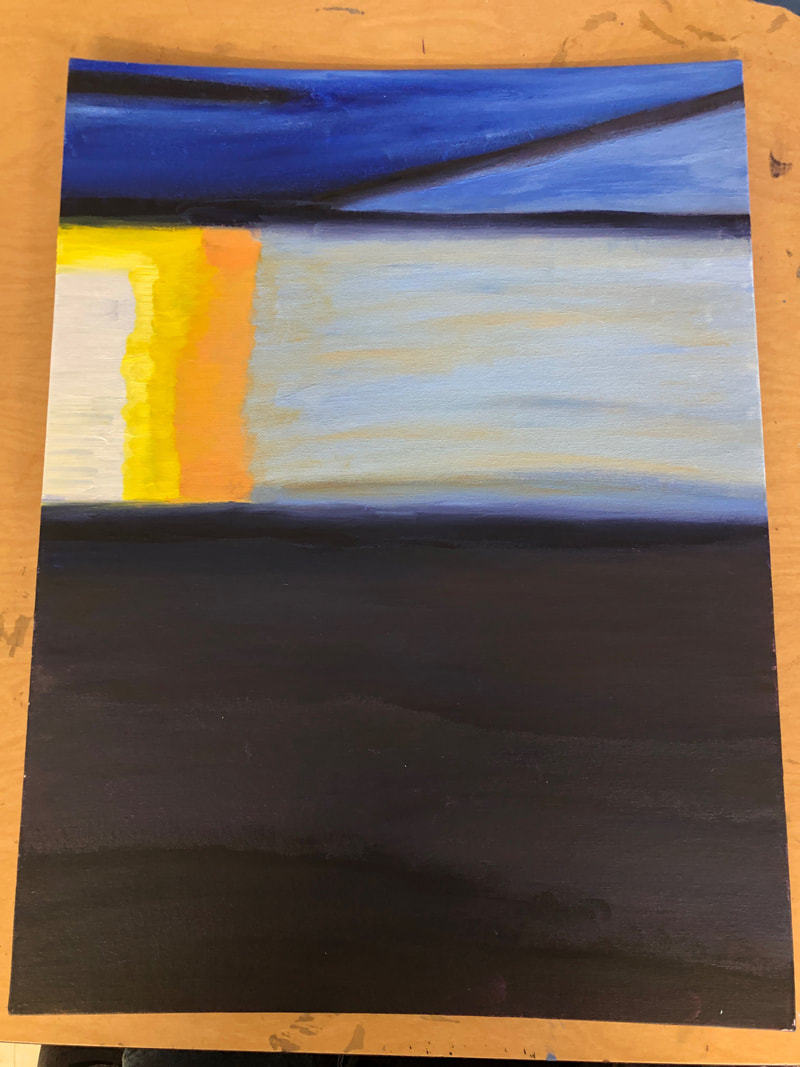
Project #3--> Landscape Pt 1
1. I tried to master acrylic paint. I mastered getting the values that I wanted for my piece but I struggled with blending those colors in to make it look more cohesive.
2. I took inspiration from artists as to how to make the colors in the sunset. Which colors to blend in order to get that perfect sunset yellow and orange, and a specific purple that resembles the clouds that are no longer lit by the sun.
3. First I worked on getting the sky to be ombre, then I worked on the purple clouds and finally I worked on the yellow and orange clouds.
4. I would consider working more on the yellow and orange clouds.
5. This piece is one small part to the larger piece I'm creating. Its the top left corner of the giant landscape that I'm going to paint.
Project #2--> MCA Competition
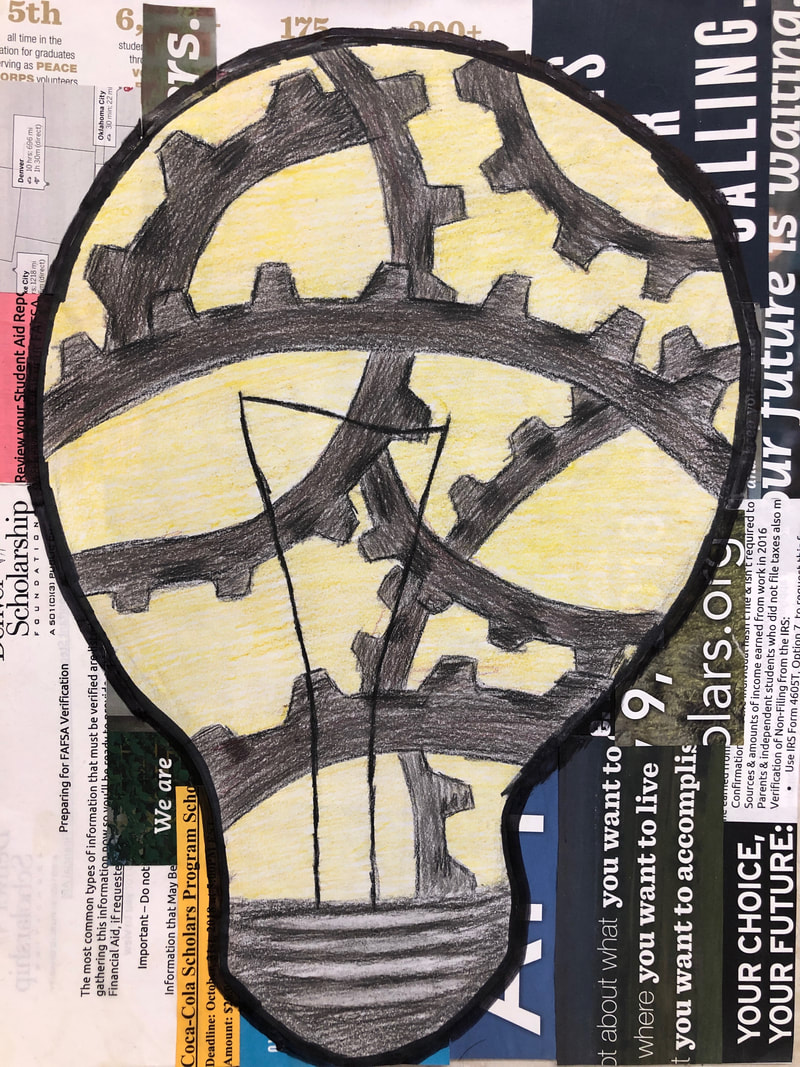
1. I tried to master collage by cutting out and pasting a bunch of college information and statistics.
2. The theme this year was still loading, so I interpreted that as my thought process in regards to college.
3. I first cut out the college information , pasted it on a piece of paper, drew a light bulb with gears in it, finally I cut it out and put it on the collage.
4. I would spend more time drawing the light bulb and gears in order to make them look more realistic.
5. This doesn't really connect with my other pieces however, I liked the challenge of trying to fit a theme and interpreting it in my own way.
Project #1-->Self Portrait

1. I tried to master charcoal in this piece. I struggled a little with the willow charcoal and controlling the shading with that but I think I mastered the permanent charcoal.
2. I drew inspiration from Ms. O'Ryan's self portrait in terms of shading especially with the nose. I learned tips and tricks for making my self portrait look more realistic from O'Ryan's piece.
3. I started with the outline of my hair, then the outline of my face. My eyes were the first thing that I worked on in terms of my face followed by my lips and then my nose. Next, I worked on my hair and finally shaded in my face and neck.
4. I would redo the shading of my neck and face in my piece. In the picture there is particular shading but I could have don't it better if I spent more time on it. I feel like because the shading wasn't very successful it makes my portrait look a little bit weird.
5. This doesn't really connect to my theme however it was fun to do since I haven't done a traditional self portrait since 4th grade and my skills have definitely improved.
Still Life

1. I tried to master black chalk and color chalk. I struggles with making the objects look real when drawing with chalk.
2. I used an image that Ms. O'Ryan gave me and tried to replicate it with chalk.
3. First, I started with splitting my paper into a grid and splitting the image into a grid so that I could replicate the size and area of each object in the image. Then, I drew the shapes with black chalk and added in value. After that, I added color to the background and shapes then added color to the dark areas that I already shaded.
4. I would consider taking more time to color in the background and the shapes. I would make one of my main focuses making the shapes look realistic.
5. This is the first piece to see what skills we have now and look back on it at the end of the year to see our growth.
